Creating an invoice — step by step
Start here — customer details & screen layout
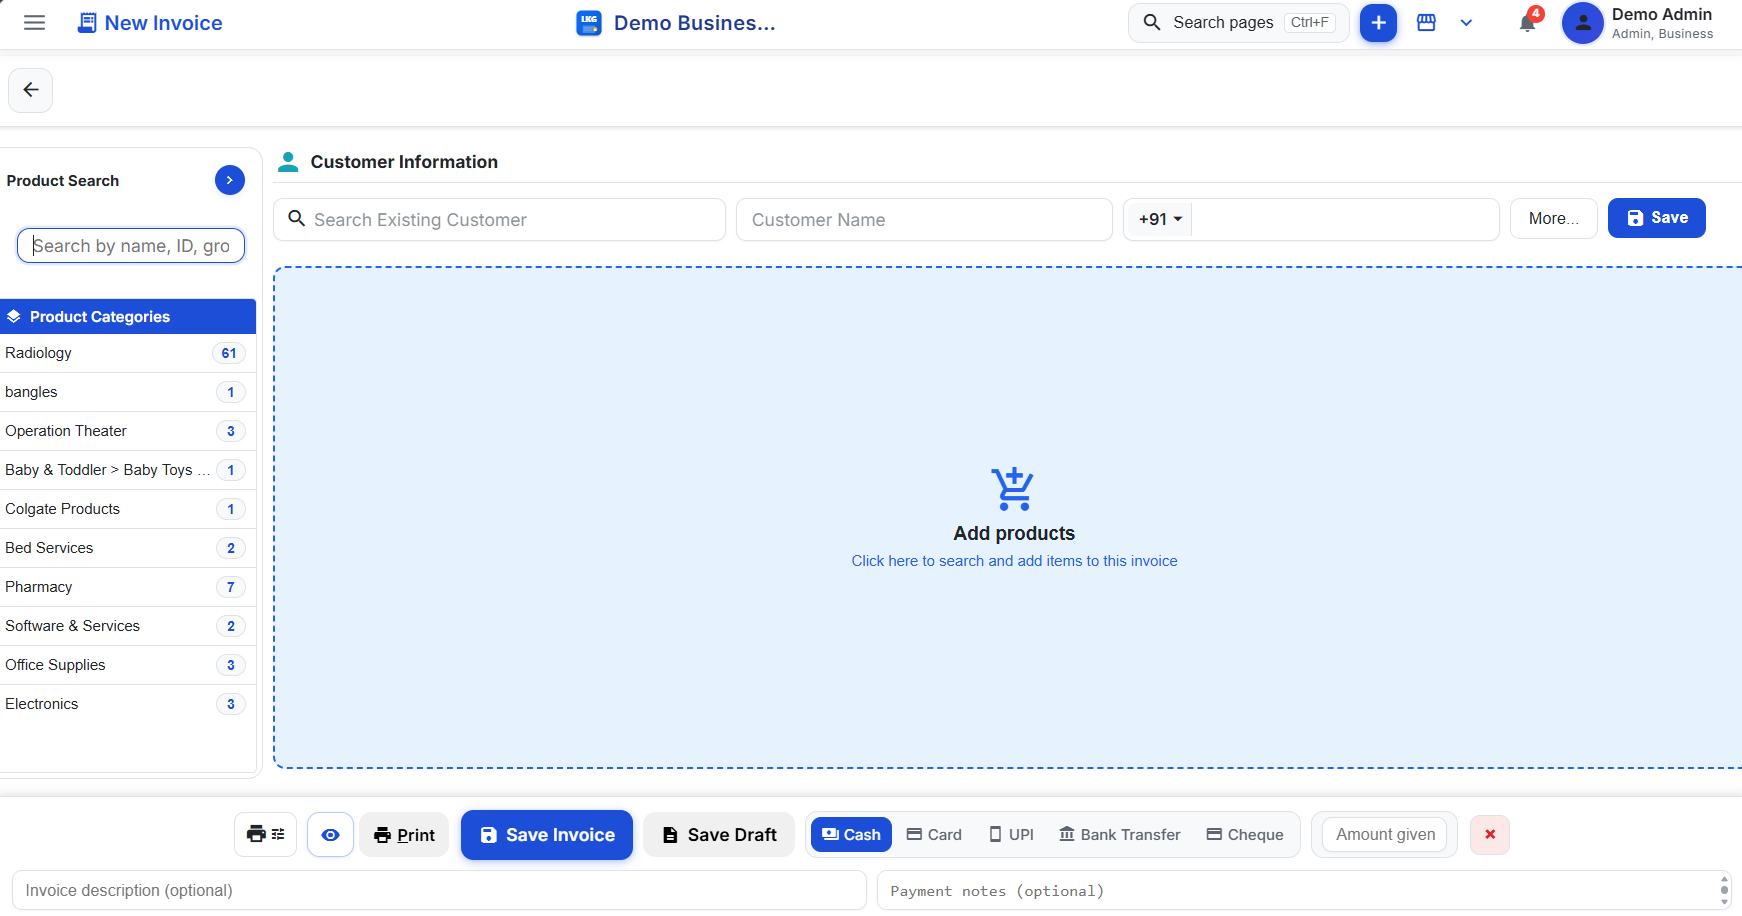
- 1Search Existing Customer
Repeat customer? Type here and pick them — their details fill in automatically.
- 4Product Search
Find products by name, ID or group and add them straight to the invoice.
- 5Product Categories
Browse by category — the badge shows how many products each one holds.
- 9Save or Print
Save Invoice finalizes the sale, Save Draft keeps it for later, Print sends it to your printer. The eye icon shows a preview first.
- 10Navigation & Search
Search pages (Ctrl+F) jumps to any screen; the bell shows alerts.
- 2Customer Name
New customer? Type their name here — it appears on the printed invoice.
- 3Phone Number
Enter the mobile number after the +91 code, then click Save to store the customer. More… opens extra fields like address and email.
- 6Add Products
Click this area to search and add items — they appear here with quantity and price.
- 7Payment Method
Pick Cash, Card, UPI, Bank Transfer or Cheque, and enter the amount given to calculate change.
- 8Notes (optional)
Add an invoice description or payment notes — saved with the invoice.
Adding a product — step by step
Core product details
- 1Product Category
Select Existing and pick a category from the dropdown below, or use Create New Category for a brand-new one.
- 3Unit & Quantity
Choose how the product is sold (Pieces, Pack…) and how many come per unit. Fields marked * are required.
- 4Pricing
MRP is the maximum retail price; Unit Price is what you actually sell at. The difference becomes the discount.
- 7More Sections & Tax
Expand additional details or stock information when needed (see Screen 2). Use Group Tax Rate applies the category's tax rate automatically.
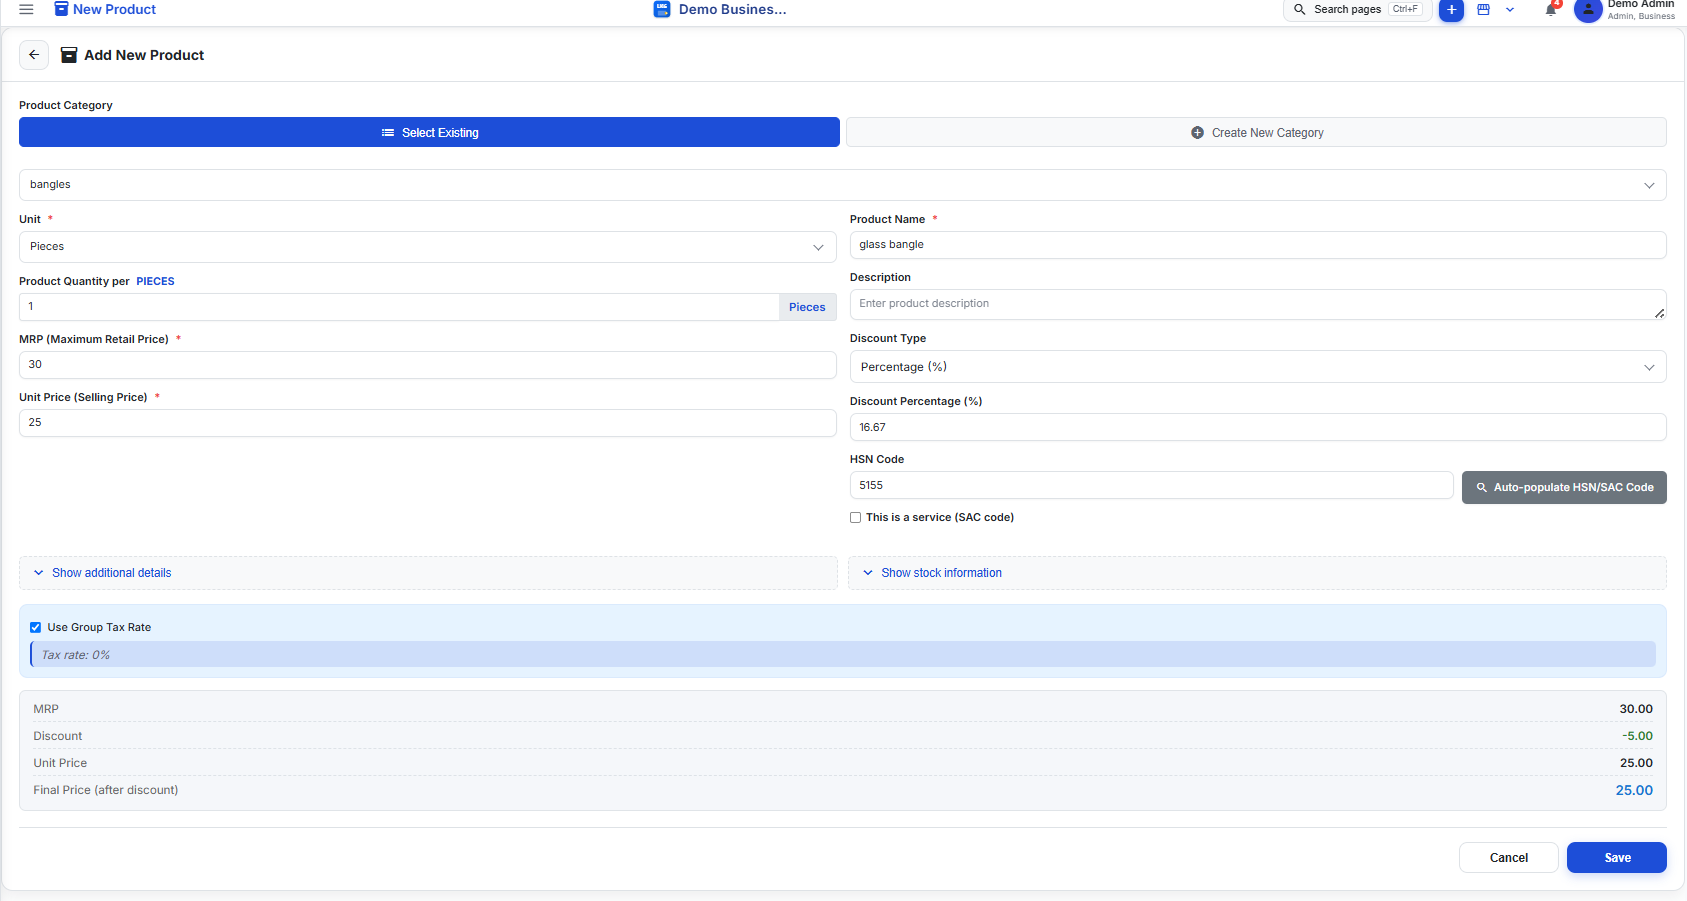
- 2Name & Description
Product Name is required and appears on invoices. Description is optional.
- 5Discount
Pick Percentage or Flat, then enter the value. Here 16.67% is calculated from MRP 30 vs selling price 25.
- 6HSN / SAC Code
Type the HSN code or click Auto-populate to look it up. Tick "This is a service" to use a SAC code instead.
- 8Price Summary
A live check of your numbers: MRP, discount, unit price and the final price after discount.
- 9Save or Cancel
Save adds the product to your catalog; Cancel discards the form.