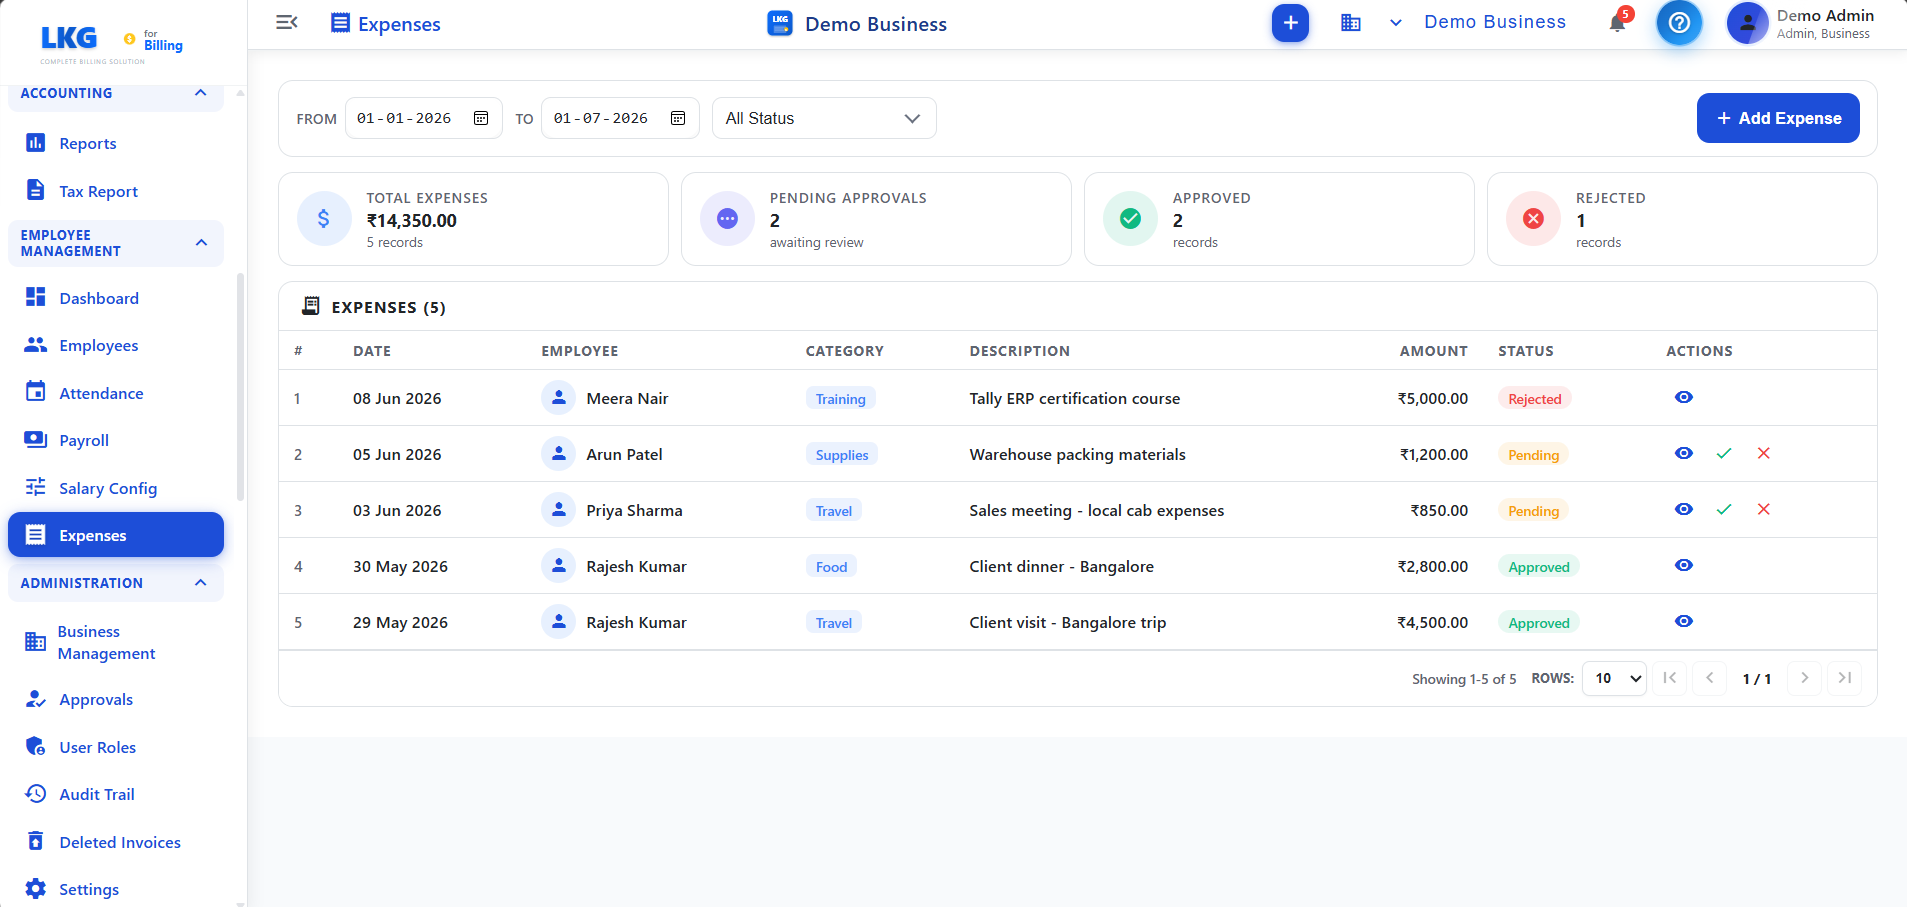
Employee Expenses
Deze pagina gebruikt u voor medewerkerskosten, aanwezigheid, salarisadministratie of profielgegevens.
Open de pagina via het juiste menu in de zijbalk en volg de aanwijzingen op het scherm.
Overzicht
Deze pagina gebruikt u in LKG for Billing om registraties te controleren en de juiste workflow af te ronden. Controleer de gegevens voordat u wijzigingen opslaat zodat rapporten, facturen en gekoppelde workflows consistent blijven.
Workflow
- Selecteer de juiste datum, klant, medewerker, product of statusfilter.
- Controleer de gegevens in de tabel en open de juiste registratie.
- Sla op, deel, exporteer of rond de volgende actie af wanneer dat nodig is.
Belangrijke gegevens
| Veld | Beschrijving |
|---|---|
| Naam / referentie | De hoofdnaam, klant, product, medewerker of referentie van de registratie |
| Status / datum | De status en datum die worden gebruikt voor filtering en opvolging |
| Bedrag / aantal | Bedrag, hoeveelheid, aantal of andere meetbare waarde |
| Actie | Openen, bewerken, delen, exporteren, goedkeuren of verwijderen volgens rechten |
Tips
advies
Nauwkeurige datums, bedragen en referenties maken rapportage en audits eenvoudiger.
opmerking
Laat alleen bevoegde gebruikers belangrijke financiële of administratieve gegevens wijzigen.