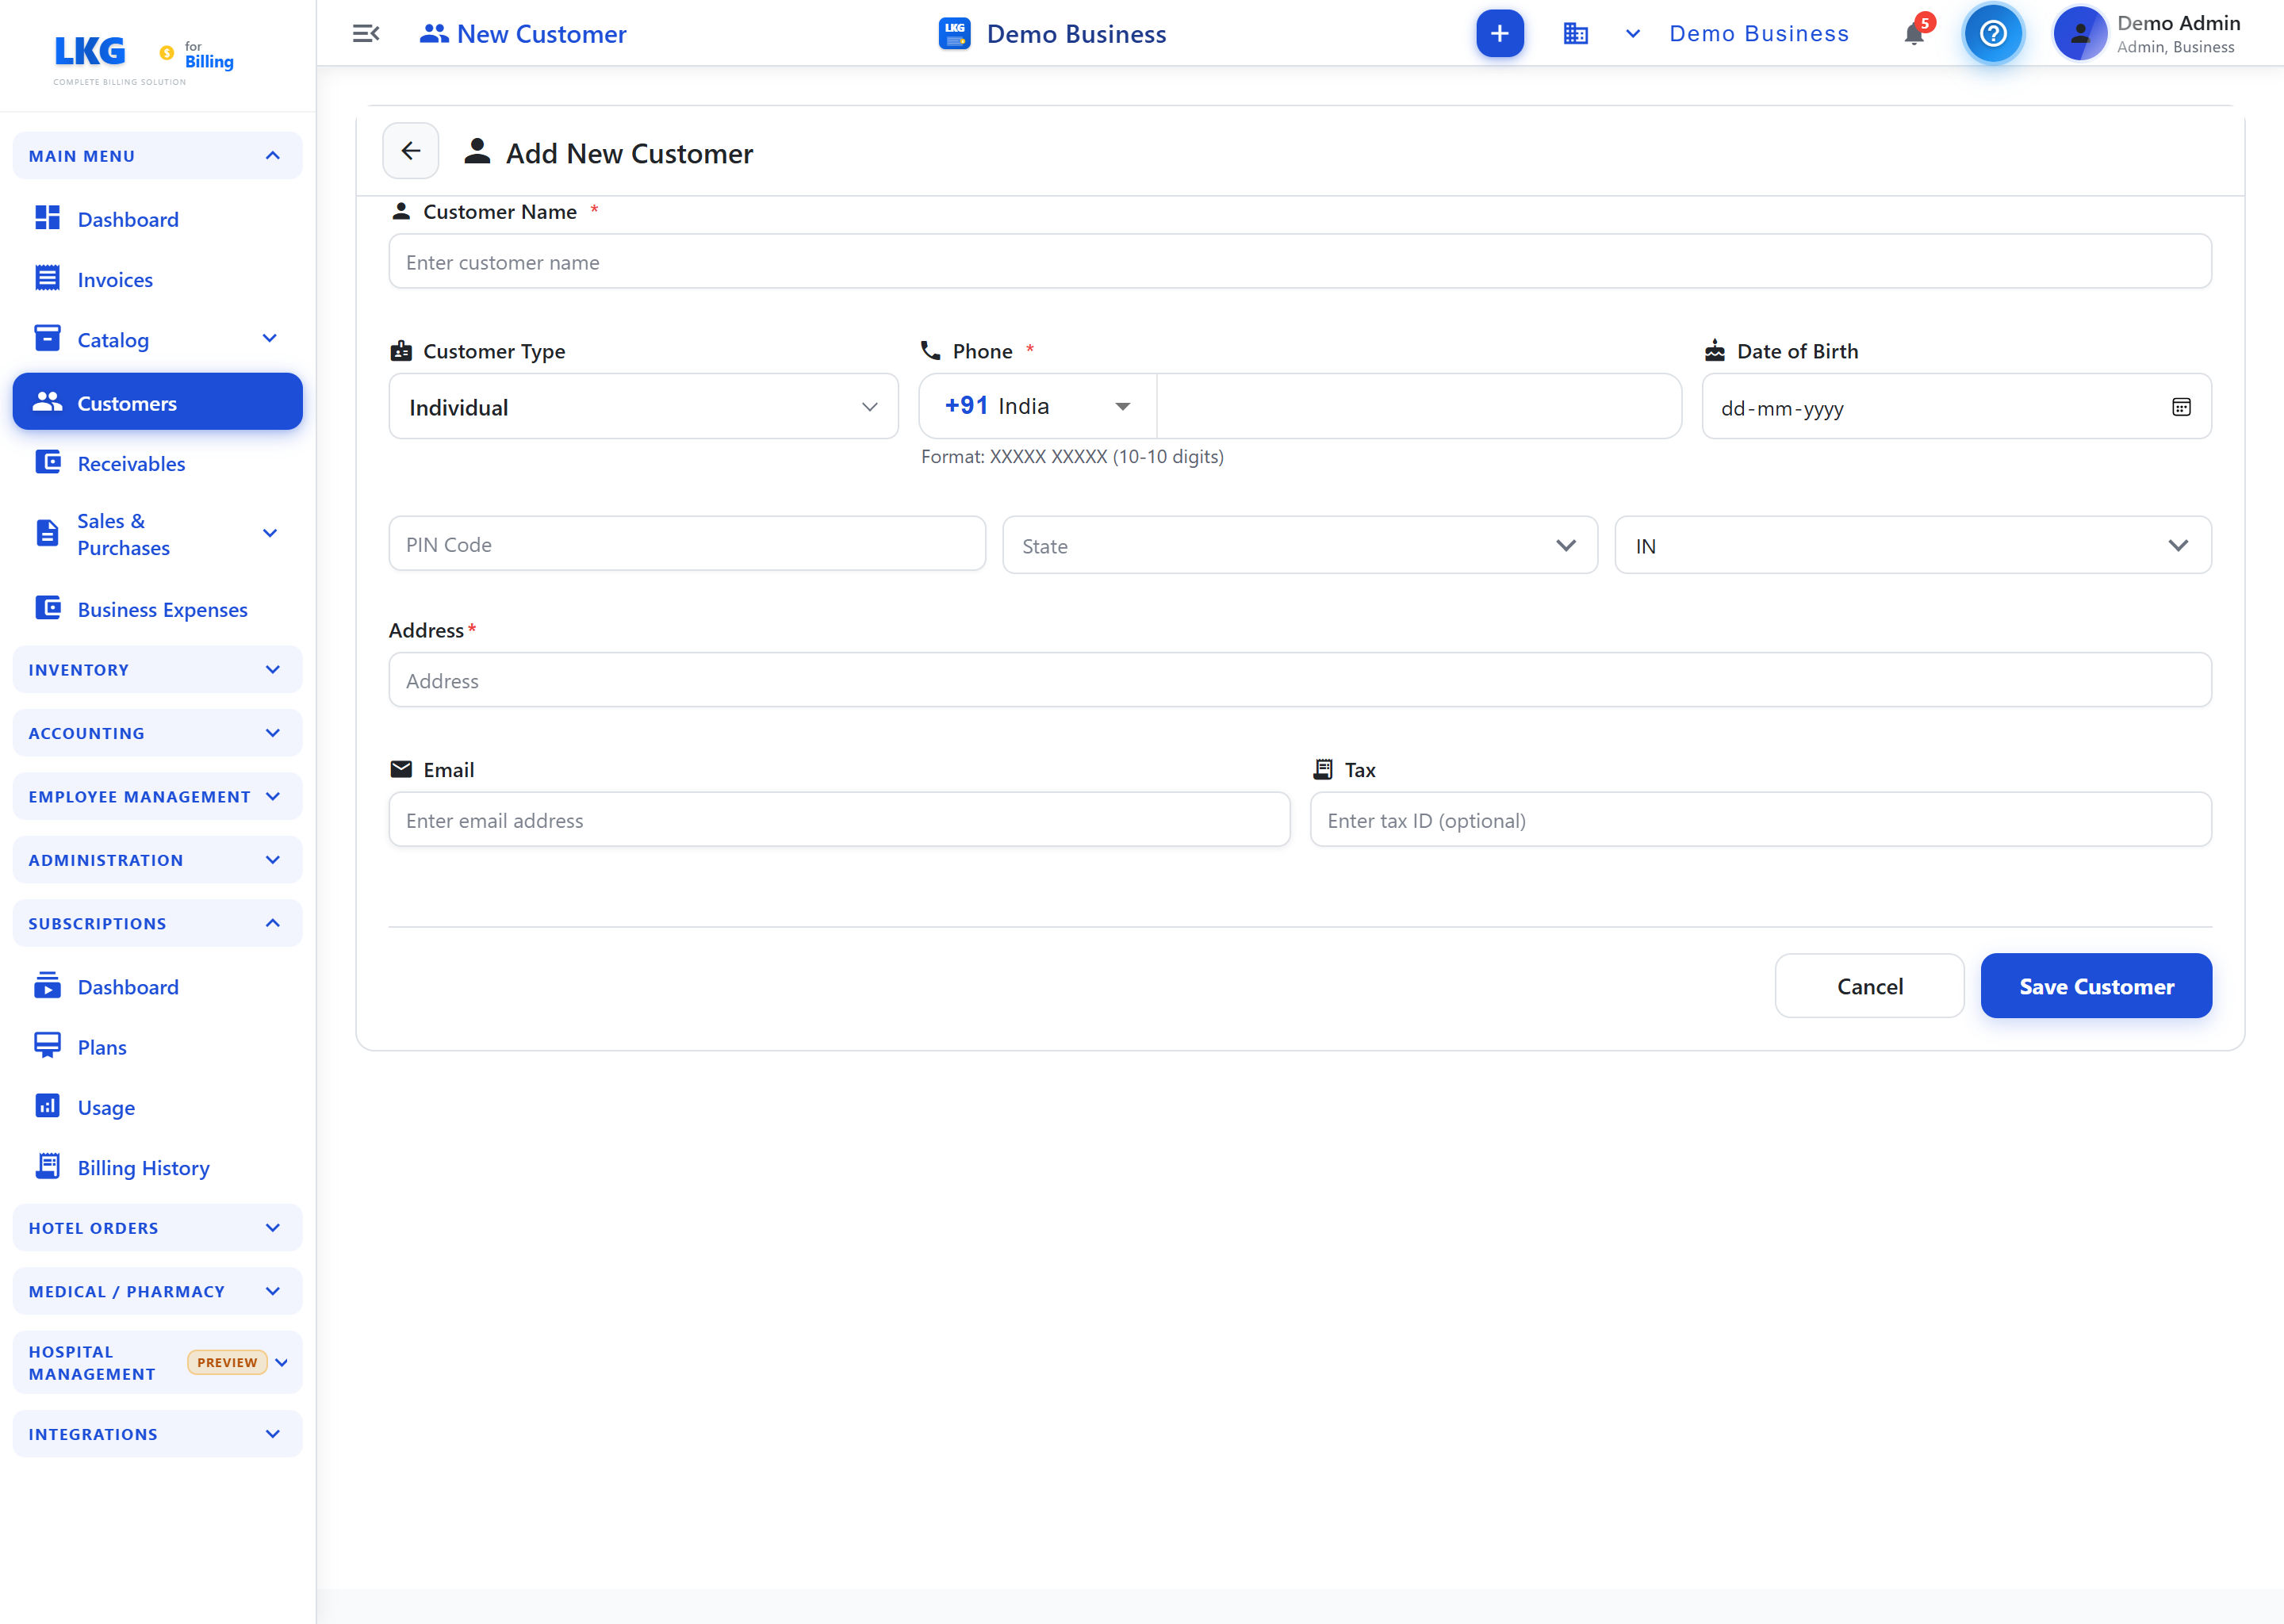
:::info Vertaalopmerking Dit document is momenteel in het Engels. De Nederlandse vertaling volgt binnenkort. :::

➕ Create a Customer

Add customers to your database so you can quickly select them when creating invoices, estimates, and delivery challans.

Steps to Create a Customer

Step 1: Open the Customer form

  1. Go to Customers from the main menu
  2. Click + Create New Customer (top right of the page)

The form opens with a blue Add Customer header.

Create Customer Form

Step 2: Fill in the form

See the full field reference below.

Step 3: Save

Click Save Customer. The customer is added to your database immediately.


📝 Form Fields

Customer Name (required)

The full name of the customer — individual's name or company name.

  • Shown on all invoices and documents
  • Example: XYZ Retail Solutions, ABC Technologies Pvt Ltd

Customer Type

Select the type of customer from the dropdown:

TypeDescription
IndividualPersonal customer — no GSTIN required
BusinessCompany customer — add Tax ID for GST compliance

Phone (required)

Phone number with a country code selector.

  • Select the country flag/code (default: +91 India)
  • Enter the 10-digit number
  • Format: XXXXX XXXXX

Address Fields

The address fields appear in a single row:

FieldRequiredDescription
Pin CodeOptionalPostal/ZIP code
StateOptionalState dropdown — determines CGST/SGST vs IGST calculation
CountryOptionalCountry dropdown (default: India)
AddressOptionalStreet address / full address

:::warning GST Calculation The State selection determines whether invoices apply CGST + SGST (same state as your business) or IGST (different state). Set it correctly for accurate GST on invoices. :::


Email & Tax

These two fields appear side by side:

FieldRequiredDescriptionValidation
EmailOptionalCustomer's email addressValid email format
TaxOptionalGSTIN or Tax Identification NumberAlphanumeric, up to 30 characters

:::tip GSTIN For business customers, entering the GSTIN (e.g., 29AABCA1234A1Z5) ensures GST compliance on invoices. :::


🔘 Action Buttons

ButtonAction
Save CustomerSaves the new customer and returns to the Customers list
CancelDiscards all changes and returns to the Customers list

:::info Edit mode When editing an existing customer, the save button shows Update Customer instead of Save Customer. :::


✅ After Creating a Customer

  • The customer appears in the Customers list immediately
  • Available in invoice, estimate, and delivery challan creation forms
  • Go to Receivables to track their outstanding invoices

💡 Quick Add from Invoice Form

You can also create a customer directly while creating an invoice — no need to navigate to Customers first:

  1. In the invoice form, click the Customer search field
  2. If the customer is not found, click Add New Customer
  3. Fill in the mini-form inline
  4. The customer is created and selected automatically

⚠️ Validation Errors

ErrorCauseFix
Customer Name is requiredName field is emptyEnter the customer name
Invalid emailEmail format is incorrectCheck the email format (e.g., name@example.com)